Little Cottage Interiors

Anthropology Inspired Dresser

Hooray! I am finally done with this project! I bought two dressers, I’m not even kidding you, back in October and I have been slowly completing them. That means for a whole six months we’ve been shuffling them around our house. Need I remind you that there’s barely enough room for the stuff that belongs much less anything extra. I would work on them in my kitchen, then push them into the living room and we’d shove them in the office if we had company. I enjoy what I do but, man would it be nice to have an official work space.

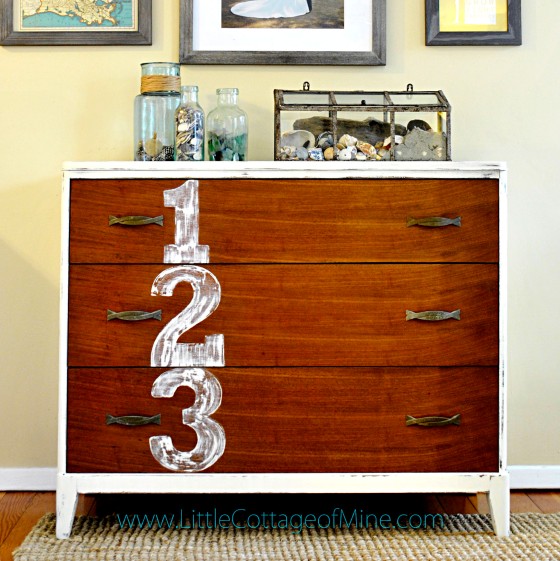
This first dresser I’m sharing is a great find. Its very solid and the drawers are nice and big which made them perfect for a little Anthropology inspiration. Of course the original finish had grown very orange. So I stripped the drawers and stained them with a medium walnut. The base got a coat of ASCP in Old White and heavily distressed it.

123 Dresser Front II

I really love how the painted numbers turned out. Its super easy to do so I snapped some pictures as I went along to share in case you would like to try it too! Here’s how I got ‘er done.

Step one: Look on your computer and find a font that you like. I used a basic word processing program. Type each number as large as you can and print it out. Measure all drawers to determine each number’s size. Then, I went to Staples and they were able to enlarge the font to each drawer’s specifications. It was under $1.50 for all three! Easy peasy. Then just cut out each number and you’re ready to trace! I know that’s more like ten steps but they’re all pretty basic.

123 Dresser How To 5

Step two: Tape a piece of string to the top of the dresser where you want the center of each number to be, level it then tape it to the bottom. This gives you a nice guide for each number.

123 Dresser How To

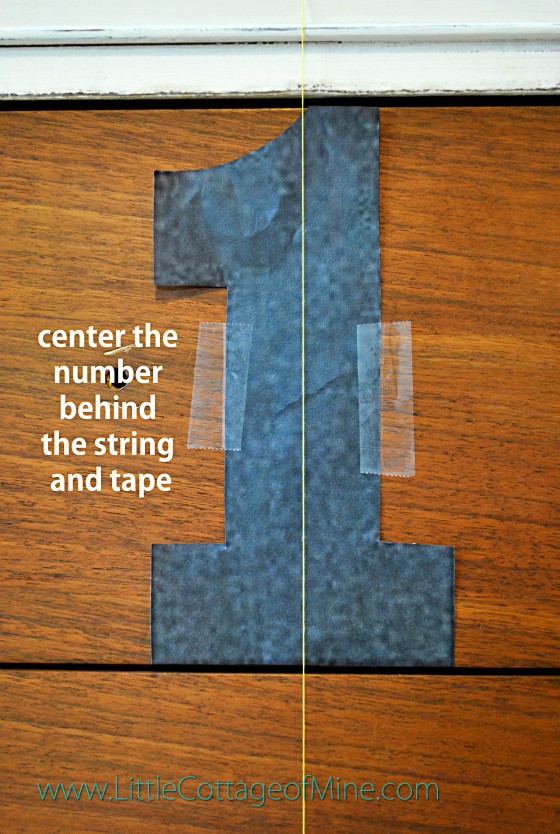
Step three: Center each number behind the string and tape it in place.

123 Dresser How To II

Step four: Trace around the cut out lightly with a pencil.

123 Dresser How To III

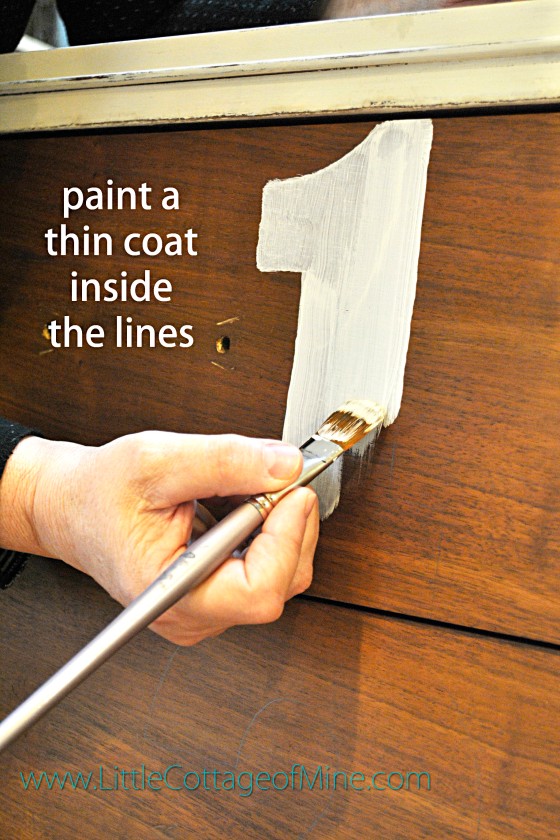
Step five: Now its time to paint! I prefer a light coat because I wanted a very distressed look in the end and less paint makes that easier. Try to keep your brushstrokes going in the same direction.

123 Dresser How To IIII

Step six: After each number was painted I very carefully sanded only on the painted areas. I didn’t want to spread too much dust to the stained wood. I found it very helpful to wet distress with a damp paper towel around the edges. This removed the paint without damaging the wood.

123 Dresser 123 Close Up

Then, my mom waxed the whole dresser and it was done! These pictures don’t do the distressing justice. It looks so great in person!

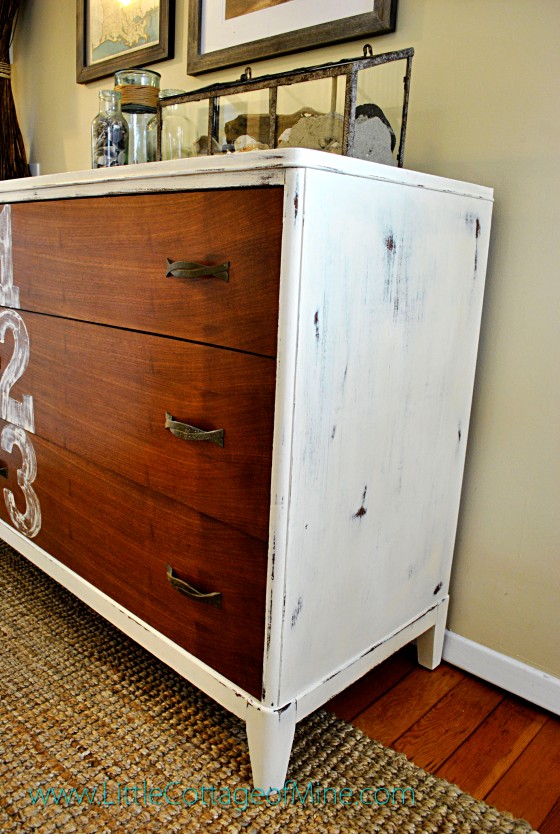
123 Dresser Side

There’s a small section along the edge of the top that naturally crackled, to keep it I avoided sanding those areas. It looks so cool and helps to age the fresh paint.

123 Dresser Top

What do you think? Are you a fan of mixing things up a bit and trying out a new trend? I have to admit that I was hesitant to give it a try but I’m so happy I did! It was fun and I really like how it turned out.

123 Dresser Front

Thanks so much for stopping in!

Kelli

Link up at:

East Coast Creative

Domestic Superhero

Little Cottage Interiors

French Server in Old White

With hurricane Sandy passing Long Island this week we are very fortunate that our little cottage held up like a champ.  Because high winds, coastal flooding and torrential downpours were anticipated we braced ourselves for every worst case scenario.  However, our part of the island did not get much rain so our basement was safe from flooding.  High winds did take some trees down in our neighborhood but thankfully no one was hurt.  We even managed to keep our electricity!  Our town is always awesomely quick on the clean up.  Debris and trees have already been safely removed.   As happy as we are to have no lasting scars from Sandy a lot in our area especially those closer to the city and the north and south shores have lost everything so we are keeping them in our thoughts and prayers.

A very sweet friend of my friend Lizzy, ya’ll should know her by now :), recently moved and couldn’t take some of her cherished antique furniture to her new house.  She was sad to leave them behind but after learning I enjoy painting and refinishing furniture she graciously said I could have them.  So I hope she enjoys reading about this little piece because it probably looks really familiar, hi Bree!

Isn’t it pretty?  I think its such a great size.  Not too big but still big enough.  The condition was really great except for a small area of damage on the top.  As with any piece that has a long relationship with the past, it can’t be perfect.  The mark was difficult to remove and after I sanded and sanded its mostly gone.  I don’t think you even notice it now because it turned out so gorgeous!

A dark walnut stained top, the rest beautifully painted in Old White and distressed, then finished with several coats of clear wax.

Lizzy cleaned the hardware with water, salt and baking soda to remove just a hint of the oil build up from years of use which was a little too black.  Now,  through the aged patina you can see the lovely detail of the original brass pulls.

Lizzy’s got some really beautiful things in her collections and she lets me borrow them!  Thanks Lizzy!

Check out the legs.

Bree used it as an entryway table which I think is a great idea.  I also picture it in a bathroom or a guest bedroom.  I really wish I could keep it for my kitchen!  Its the perfect size for my little nook, sigh, but I think its a little too gorgeous for my humble kitchen.

Has anybody seen a piece similar to this and would you have an idea of the age?  I did show it to a local antique guy and he thinks its from the 1940’s but it looks a tad older than that in my opinion.

Thanks for stopping in today!


Linked to:

Primitive & Proper POWW

Little Cottage Interiors

 French Sofa Table in Duckegg

Here is a nice little French-y sofa table painted in Duck Egg.  Its got sweet lines and is unusually large for this sort of piece if you ask me which makes it unique.

I purchased it from a garage sale.  It was in ‘ok’ condition but the finish was very dark.  My first thought was to strip the top and refinish it but that was a big giant AIN’T GONNA.  After two thick layers of Citristrip (one that I left on overnight) the stain was so deeply red and dark that it wasn’t budging.

Dark and stripper resistant!

It needed a fresh start in a much lighter color.  So with a little primer first to prevent the former life from bleeding through, two very thin coats of chalk paint in Duck Egg, a little distressing, some wax and its finished.

Its going on Craig’s List today, hopefully someone will love it!

I’m very excited about two dressers that I’m picking up this week.  They are both mid-century inspired and I can’t wait to get started on them!

Also, I’ve been working on some more burlap wreaths.  Remember the $50 Amazon gift card I won from Restore Interiors?  Well, I purchased ten 14 inch wire wreath forms and it was very nice getting them for FREE!  I got adorable winter embellishments to go on them.  They remind me of a ski lodge, cozy winter sweaters and hot chocolate.  Selling all ten would be awesome!

Thanks for visiting!

Linked to:

Primitive & Proper POWW